A well-executed interior finish starts with a surface that has been properly evaluated and prepared for the coating system that will go over it.
For standard interior painting, that means creating a clean, stable, uniform base before the finish coat is applied. As the work moves into cabinetry, millwork, paneled rooms, and high-gloss finishes, the preparation becomes more exact because the finished surface reveals more of what is underneath it.
Cleaning, sanding, repairs, primer selection, and cure time all influence how the final coating performs and how refined the finished surface appears.
At Pro Painters LTD, the surface determines the preparation and coating system. Drywall, plaster, cabinetry, and architectural millwork are treated according to the material, existing condition, and intended finish rather than following one standard painting process.
Jump to section
Interior Painting Begins With Assessing the Existing Surface
Before specifying a primer or topcoat, we first determine what we are working with.
That includes the substrate itself, previous coatings, existing repairs, moisture history and potential adhesion problems. Walls, ceilings, trim, cabinetry and built-ins are evaluated separately because each surface behaves differently.
This is the basis of our process.
For interior painting, a wall may need patch correction, sanding or skim coating before primer is applied. Existing millwork may require adhesion testing and additional surface correction. Cabinetry may need thorough degreasing before sanding even begins.
The professional finish specification comes after that assessment.
Surface Preparation Changes With the Substrate
There is no single preparation sequence that applies throughout an entire home.
Drywall
Drywall is checked for surface irregularities, visible seams and previous repairs.
Where the surface requires greater refinement, skim coating can be used to create a Level 5 finish before sanding and bonding primer are applied.
The objective is to create a consistent surface before the final wall coating goes on rather than relying on the paint to disguise existing defects.
Trim and Architectural Millwork
Trim and millwork are evaluated for adhesion, knot bleed-through and cracking around joints or caulk lines.
Preparation can include degreasing, deglossing, sanding and stain blocking before the appropriate primer and finish system are applied.
The amount of correction depends on both the existing surface and the finish being specified. A conventional architectural enamel and a high-gloss finish do not place the same demands on the substrate.
Ceilings
Ceilings are evaluated for staining, moisture, inconsistent texture and previous application marks.
Depending on their condition, preparation may include washing, stain blocking, complete sanding, texture correction and additional priming before the ceiling finish is applied.
Built-Ins and Cabinetry
Cabinetry introduces another set of variables.
Even cabinetry that appears clean can contain cooking grease and airborne oils that interfere with adhesion. The surface must be properly degreased before sanding and coating.
Pro Painters then evaluates the substrate, previous finish and intended result to determine the primer, sealer and topcoat system.
Depending on the project, that may include an intermediate vinyl sealer followed by a 2K topcoat or conversion varnish.
This is also why there is no single “best primer” for every surface. Primer has to solve the problem presented by the substrate. Our guide to the best primer for interior walls explains that distinction in more detail.
Historic Plaster
Historic plaster requires a different approach from modern drywall.
Cracking, failed keys, previous repairs and uneven areas are evaluated before professional refinishing begins. Depending on the condition, the plaster may require consolidation, reinforcement and skim coating with a masonry plaster compound before sanding and priming.
The goal is to retain the existing material where it can be successfully repaired rather than treating it as ordinary drywall.
Fine Finish Work Requires a Flatter Surface
The difference becomes especially visible with high-gloss work.
A matte wall finish can visually soften small variations in a surface. High-gloss lacquer cannot. Reflected light moves across the finish and exposes high and low areas that would be much less noticeable under a lower sheen.
That means the substrate has to become flat, not simply smooth.
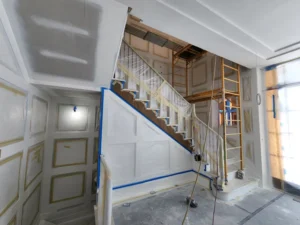
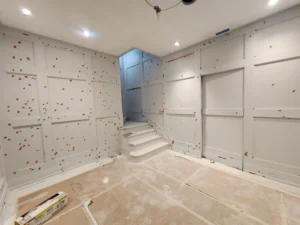
On one Birmingham high-gloss project, Pro Painters used 3 additional primer applications on the specialty surfaces. Each primer coat was block-sanded, and contrasting guide coats were used to reveal remaining high and low areas before the next stage began.
The surface was repeatedly inspected and corrected before the finish coat was applied.
This process is closer to preparing an automotive finish than performing a conventional wall repaint.
Why Block Sanding and Guide Coats Matter
Ordinary sanding can make a surface feel smooth to the touch while leaving subtle waves across larger panels.
Block sanding addresses those variations differently. A rigid sanding block progressively levels the surface instead of simply following its existing contours.
Guide coats make the remaining irregularities easier to see. As the contrasting coat is sanded away, low areas remain visible and can be corrected before another primer coat is applied.
This is especially important on paneled walls, built-ins and architectural millwork where uninterrupted reflected light can reveal inconsistencies across a large surface.
The final reflection begins with the surface beneath it.
Primer Is Part of the Finish System
Primer should not be treated as a generic coat applied between preparation and paint.
Pro Painters selects primer according to both the substrate underneath and the coating that will follow it.
A primer may need to provide adhesion, block staining, seal a repaired surface or create the correct base for a specialized topcoat.
On fine finish projects, that may also mean applying more than one primer coat, sanding between applications and inspecting the surface again before continuing.
This repeated preparation is what allows the final coating to perform as intended.
Preparation Protects Architectural Detail
Preparation also has to respect the architecture.
Older trim and millwork can lose definition after repeated cycles of filling, caulking and repainting. Profiles become rounded and joints can accumulate excessive material.
Zaggy’s approach is to preserve those details during preparation rather than simply adding another layer over them.
That can mean carefully sanding existing coatings, using restrained caulk lines and correcting localized defects before primer is applied.
The purpose is not only to make the surface smooth. It is to maintain the shape and proportion of the millwork once the new finish is applied.
The Process Becomes More Exact as the Finish Becomes More Specialized
This is where conventional interior painting begins to overlap with fine finish work.
Walls and ceilings still require sound preparation, but cabinetry, paneled rooms, custom doors and architectural millwork place greater demands on the coating system.
High-gloss lacquer requires additional leveling and inspection. Cabinetry may require industrial 2K coatings or conversion varnishes. Specialty finishes such as Venetian plaster, limewash and mineral coatings have their own substrate requirements.
The process changes because the surface changes.
That principle applies whether Pro Painters is repainting an interior room or developing a custom finish with a homeowner, designer, architect or builder.
Preparation Should Be Specified Before the Project Begins
The amount of preparation required should not be discovered after painting starts.
During the initial assessment, Pro Painters determines the condition of the existing surfaces and the level of finish the project calls for. That allows the preparation, primer and coating system to be considered together.
For homeowners, this also makes estimates easier to compare.
Two painting proposals may specify the same room and the same final color while describing very different amounts of work beneath that finish.
The important questions are what will be repaired, how the surfaces will be prepared, which primer will be used and whether sanding and inspection continue between coats where required.
Those steps are what determine the surface the final coat is actually covering.
Frequently Asked Questions
Why is surface preparation so important for interior painting?
Preparation determines whether the coating can bond properly and whether repairs or surface irregularities remain visible after painting. Cleaning, sanding, repairs and primer selection all influence the durability and appearance of the finished work.
Does every interior surface receive the same preparation?
No. Drywall, plaster, trim, cabinetry and architectural millwork behave differently. Each surface should be evaluated independently before the coating system is selected.
Why does high-gloss painting require more preparation?
High-gloss finishes reflect light across the surface, making high and low areas much easier to see. Additional priming, guide coats and block sanding may be required to create the flat substrate necessary for an even reflection.
Does Pro Painters sand between coats?
Yes, when the specified coating system requires it. Zaggy’s fine-finish process can include repeated cycles of priming, sanding and inspection before the final coats are applied.
Is surface preparation included in the project estimate?
The required preparation is evaluated during the project assessment and incorporated into the proposed finishing system. The objective is to establish what the surface requires before the work begins.
Interior Painting Built From the Surface Out
Pro Painters LTD has worked throughout Metro Detroit since 1998 on interiors ranging from walls and ceilings to cabinetry, millwork, restoration and high-gloss architectural finishing.
The level of preparation changes with the project, but the principle does not: assess the surface first, build the appropriate coating system and apply the final finish only when the substrate is ready.
The quality of a professional finish is determined long before the final coat is applied. When the preparation, primer, and coating system are matched to the substrate, the result is more consistent, more durable, and better suited to the architecture of the home.
For interior painting and fine finish projects in Birmingham, Bloomfield Hills, West Bloomfield, Orchard Lake, Franklin, Troy, Rochester, Rochester Hills, Oakland Township and surrounding Metro Detroit communities, schedule a consultation.